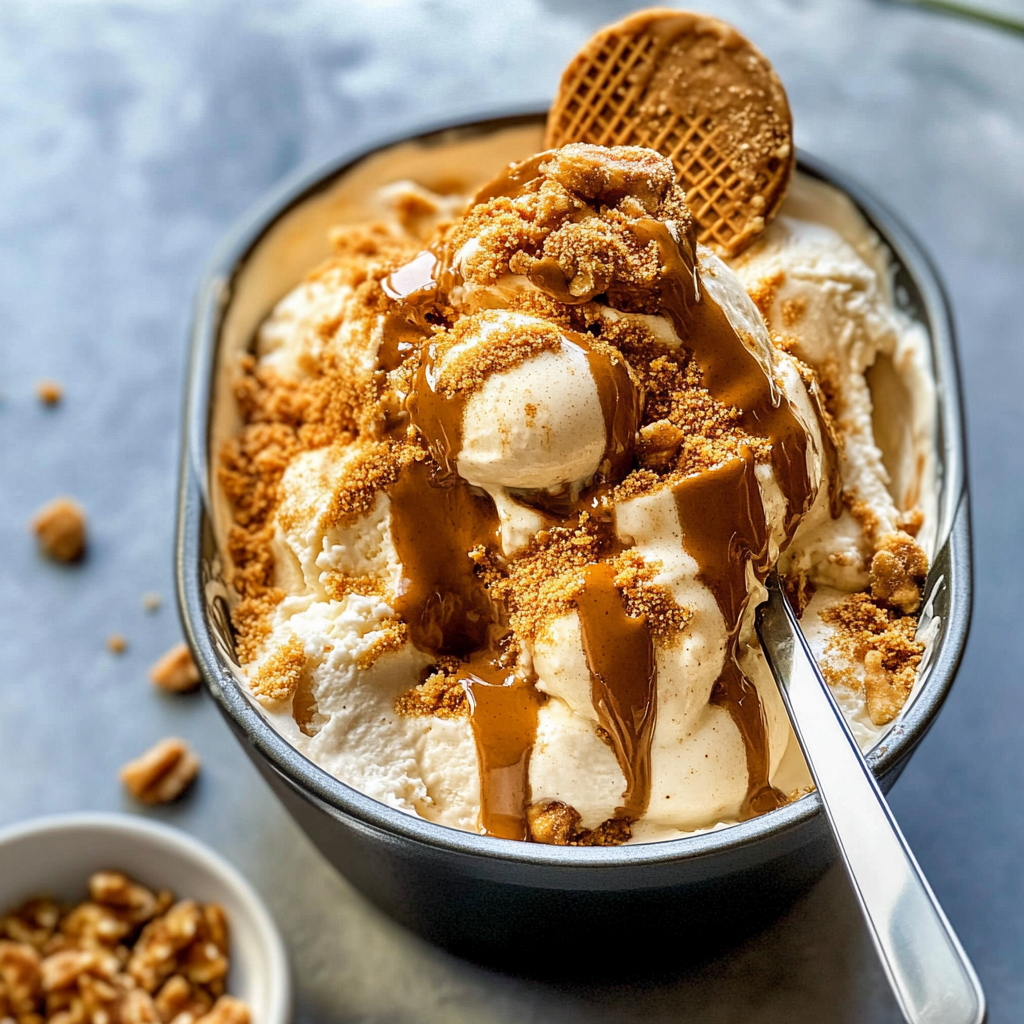
Indulging in a creamy, dreamy scoop of No-Churn Biscoff Ice Cream is like wrapping yourself in a warm blanket made of caramel and cookies. The rich, velvety texture dances on your tongue while the hints of cinnamon and brown sugar swirl around, creating a symphony of flavors that leaves you begging for another bite. Close your eyes and imagine the aroma wafting from your freezer, inviting you to dive into a sweet adventure you never knew you needed.
Now, let’s be honest; who doesn’t love a little indulgence on a hot summer day or during those cozy winter nights? Picture this: you’re lounging on the couch after an exhausting day, and all you can think about is that delightful tub of Biscoff ice cream waiting for you. This recipe is not just any ice cream; it’s an experience, a memory-maker. Serve it at birthday parties, family gatherings, or just because it’s Tuesday. You deserve this treat!
Why You'll Love This Recipe
- This no-churn Biscoff ice cream is simple to whip up with minimal effort.
- The flavor will transport your taste buds to cookie heaven with every delightful scoop.
- Its stunning caramel color and swirls make it an eye-catching dessert fit for any occasion.
- Perfect for enjoying on its own or as a topping for brownies or pies!
Ingredients for No-Churn Biscoff Ice Cream
Here’s what you’ll need to make this delicious dish:
- Heavy Cream: Use at least 36% fat content for that luscious, creamy texture.
- Sweetened Condensed Milk: This magical ingredient adds sweetness and helps achieve that smooth consistency.
- Biscoff Cookie Spread: Look for the original spread to get that authentic flavor we crave.
- Biscoff Cookies: Crushed into delicious pieces to fold into the mixture for added crunch.
- Vanilla Extract: A splash of vanilla enhances the overall flavor profile beautifully.
The full ingredients list, including measurements, is provided in the recipe card directly below.
How to Make No-Churn Biscoff Ice Cream
Follow these simple steps to prepare this delicious dish:
Step 1: Whip That Cream
In a large mixing bowl, pour in the heavy cream and whisk it until soft peaks form. You can use an electric mixer if you want to save your arm from getting tired—unless you’re looking for an impromptu workout!
Step 2: Mix It Up
In another bowl, combine the sweetened condensed milk with Biscoff cookie spread and vanilla extract. Stir until everything is well blended and harmoniously combined—like a choir of angels singing just for you.
Step 3: Fold It Together
Gently fold the whipped cream into the condensed milk mixture using a spatula. Be careful not to deflate those lovely air bubbles we created earlier; they are key in making this ice cream light and fluffy!
Step 4: Add Crunch
Next, toss in the crushed Biscoff cookies. Fold them in gently like they’re precious little nuggets of joy—because they are!
Step 5: Freeze Time
Transfer the mixture into an airtight container and smooth out the top. Cover it tightly and pop it into the freezer for at least six hours or overnight if you’re feeling particularly patient (who are we kidding?).
Step 6: Serve and Enjoy
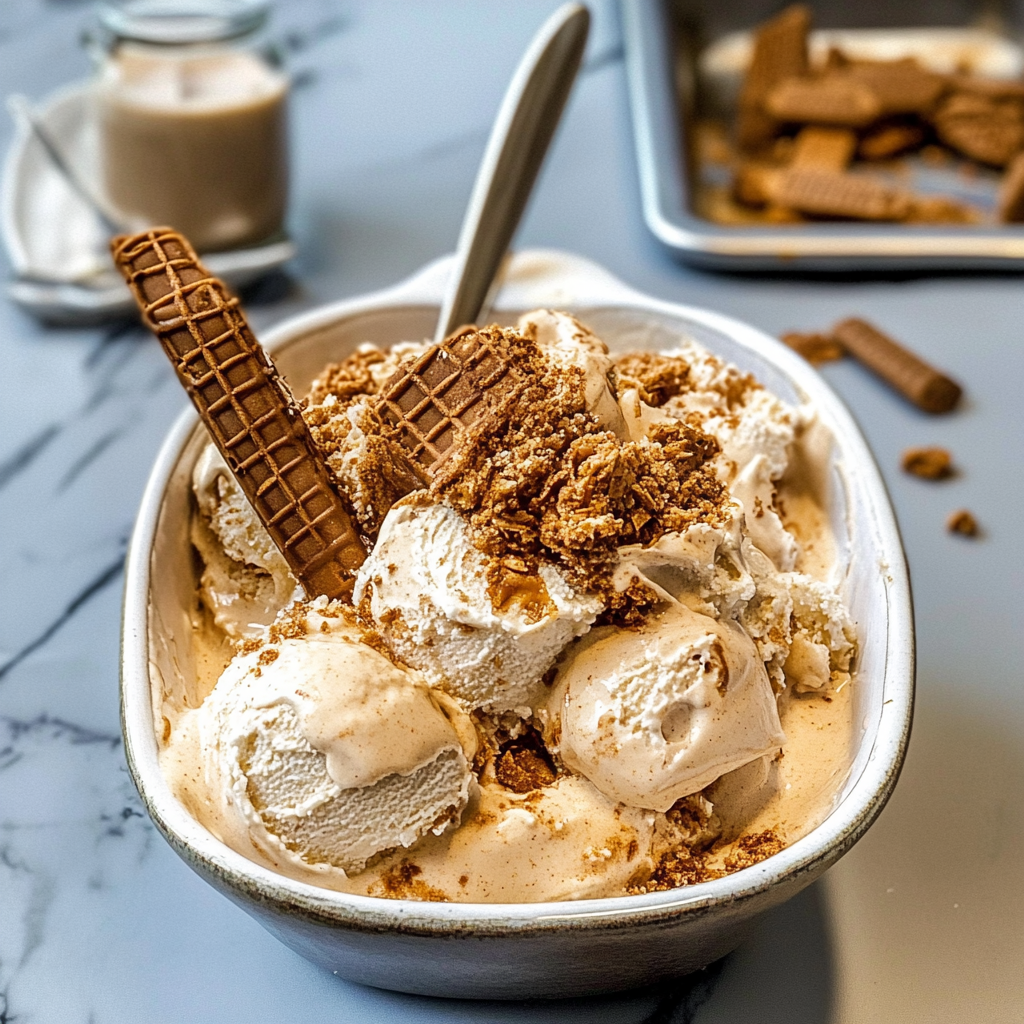
Once it’s frozen solid, scoop out generous servings into bowls or cones (or straight from the tub—we won’t judge). Drizzle with extra cookie spread if you’re feeling extra indulgent!
Now that you’ve mastered this no-churn Biscoff ice cream recipe, get ready to enjoy moments filled with laughter, joy, and perhaps some cookie-induced dance moves! Each scoop will be met with smiles from family and friends as they savor every delightful morsel. Whether it’s hot outside or you’re cozying up on the couch during movie night, this ice cream is sure to make any occasion feel special!
You Must Know
- This No-Churn Biscoff Ice Cream is a delightful treat that requires minimal effort and maximum flavor.
- With just a few ingredients, you can create a creamy dessert that will impress everyone.
- Perfect for those hot summer days or any time you crave something sweet and indulgent.
Perfecting the Cooking Process
To whip up your No-Churn Biscoff Ice Cream, start by whipping the cream until soft peaks form. Then fold in the sweetened condensed milk and melted Biscoff spread for perfect results. Freeze the mixture until set, and voilà, dessert is served!
Add Your Touch
Feel free to customize your ice cream with mix-ins like crushed cookies, chocolate chips, or even a swirl of caramel for an extra kick. chocolate chip cookies You can also try different flavored spreads if you’re feeling adventurous.
Storing & Reheating
Store your No-Churn Biscoff Ice Cream in an airtight container in the freezer for up to two weeks. If it hardens too much, let it sit at room temperature for a few minutes before scooping.
Chef's Helpful Tips
- For the creamiest texture, ensure your heavy cream is cold before whipping.
- Avoid overmixing when combining ingredients to maintain airiness.
- Lastly, allow plenty of freezing time—patience is key to achieving that perfect scoop!
Sometimes I whip up this No-Churn Biscoff Ice Cream for impromptu gatherings, and it’s always a hit! Friends can’t believe how easy it is to make, and they keep asking for the recipe. no bake cheesecake recipe Who knew simplicity could taste so good?
FAQs:
What is No-Churn Biscoff Ice Cream?
No-Churn Biscoff Ice Cream is a creamy dessert that combines the rich flavors of Biscoff cookies with a smooth ice cream base. This recipe requires no ice cream machine, making it simple to prepare at home. You can easily whip up the ingredients, freeze them, and enjoy a delicious treat without the hassle. fudgy homemade brownies The combination of sweet caramelized notes from the cookies and the creamy texture creates an indulgent experience perfect for any occasion.
How long does it take to make No-Churn Biscoff Ice Cream?
Making No-Churn Biscoff Ice Cream takes about 15 minutes of active preparation time. However, you need to freeze it for at least 4 hours or overnight to achieve the right consistency. This delay allows the flavors to meld together beautifully, resulting in a creamy and dreamy dessert. Just mix your ingredients, pour them into a container, and let your freezer do all the work while you wait eagerly for your treat!
Can I add toppings to my No-Churn Biscoff Ice Cream?
Absolutely! You can customize your No-Churn Biscoff Ice Cream with various toppings to enhance its flavor and presentation. Consider adding crushed Biscoff cookies, chocolate sauce, or whipped cream for an extra indulgent touch. Fresh fruits like bananas or strawberries can also provide a refreshing contrast to the sweetness. Get creative with your toppings to tailor your dessert to your taste! For more inspiration, check out this Ultimate Chocolate Cake Recipe recipe.
How should I store No-Churn Biscoff Ice Cream?
To keep your No-Churn Biscoff Ice Cream fresh, store it in an airtight container in the freezer. Make sure to cover the surface with plastic wrap before sealing the lid to prevent ice crystals from forming. This will help maintain its creamy texture and prevent freezer burn. It can last up to two weeks in the freezer, but it’s best enjoyed within a few days for optimal flavor and texture.
Conclusion for No-Churn Biscoff Ice Cream:
No-Churn Biscoff Ice Cream is an easy-to-make dessert that brings joy with every bite. This delightful treat combines simple ingredients, requiring no ice cream machine for preparation. With just a little waiting time in the freezer, you can indulge in this creamy delight topped with your favorite additions. hearty peanut pasta recipe Whether hosting a gathering or enjoying a quiet evening at home, this recipe guarantees satisfaction and smiles all around!
No-Churn Biscoff Ice Cream

No-Churn Biscoff Ice Cream is the ultimate indulgence that transforms the beloved flavors of Biscoff cookies into a creamy dessert. This easy-to-make treat requires no ice cream machine and features swirls of sweet cookie spread and crunchy cookie bits, promising a delightful experience in every scoop. Perfect for summer gatherings or cozy nights in, this irresistible ice cream is sure to become a favorite among family and friends.
- Prep Time: 15 minutes
- Cook Time: None
- Total Time: 4 minute
- Yield: About 4 servings (½ cup each) 1x
- Category: Dessert
- Method: Freezing
- Cuisine: American
Ingredients
- 2 cups heavy cream (36% fat content)
- 1 can (14 oz) sweetened condensed milk
- 1 cup Biscoff cookie spread
- 1 cup crushed Biscoff cookies
- 1 tsp vanilla extract
Instructions
- In a large mixing bowl, whip the heavy cream until soft peaks form.
- In another bowl, combine the sweetened condensed milk, Biscoff cookie spread, and vanilla extract until smooth.
- Gently fold the whipped cream into the condensed milk mixture to maintain airiness.
- Carefully fold in the crushed Biscoff cookies.
- Transfer the mixture to an airtight container and freeze for at least 6 hours or overnight.
- Serve scoops into bowls or cones and enjoy!
Nutrition
- Serving Size: ½ cup (125g)
- Calories: 400
- Sugar: 31g
- Sodium: 110mg
- Fat: 26g
- Saturated Fat: 16g
- Unsaturated Fat: 9g
- Trans Fat: 0g
- Carbohydrates: 44g
- Fiber: 0g
- Protein: 4g
- Cholesterol: 80mg
Keywords: Use cold heavy cream for better whipping results. Customize with toppings like chocolate sauce, fresh fruit, or additional crushed cookies for extra flavor. Store in an airtight container to keep it fresh; let sit at room temperature briefly if it hardens too much.


Leave a Comment