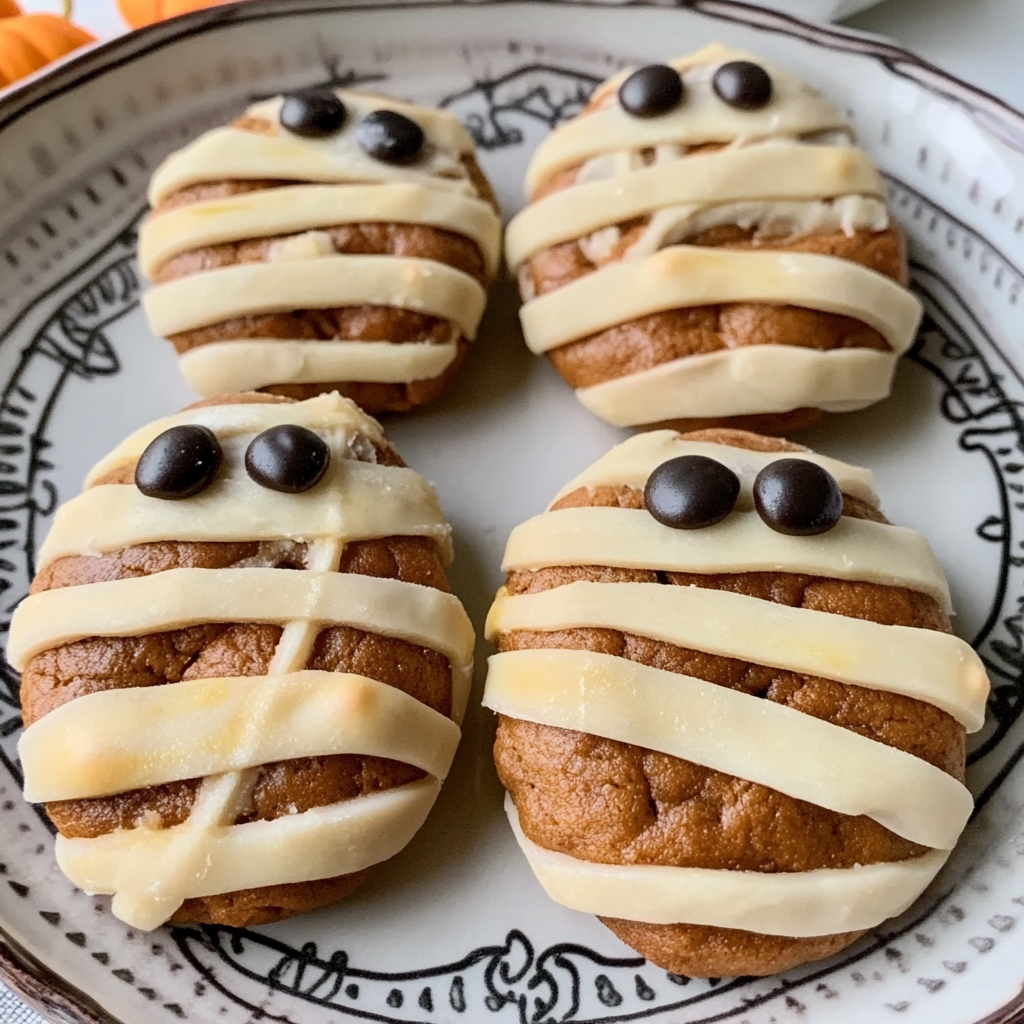
Halloween is just around the corner, and you know what that means—it’s time to get your spooky baking game on! Picture this: deliciously soft cookies wrapped in gooey white icing, with chocolate eyes peeking out. Jack O Lantern treats These Halloween Mummy Cookies are not just treats; they’re your ticket to becoming the star of any Halloween gathering. bloody red velvet popcorn The moment you pull these beauties out of the oven, your friends will be drooling with anticipation!
Remember those fun times carving pumpkins with family or scaring each other silly during Halloween? Well, these cookies bring back that sweet nostalgia while adding a twist of creativity. Whether you’re hosting a ghostly get-together or simply indulging in some frightful fun with the kids, these cookies will make you the talk of the town—trust me!
Why You'll Love This Recipe
- Whipping up these Halloween Mummy Cookies is a piece of cake, making it perfect for busy schedules.
- Their rich vanilla flavor and delightful soft texture will leave everyone craving more.
- With their adorable appearance, they’re sure to be a hit at any festive celebration.
- Plus, you can easily customize them with different toppings for added fun!
Ingredients for Halloween Mummy Cookies
For more inspiration, check out this Delightful Easter M&M Cookies recipe.
Here’s what you’ll need to make this delicious dish:
- All-Purpose Flour: About 2 ½ cups gives the cookies structure. Always sift it for lighter cookies.
- Baking Powder: Just 1 teaspoon will help your cookies rise and become fluffy.
- Unsalted Butter: Use 1 cup at room temperature for a rich flavor and tender texture.
- Granulated Sugar: 1 cup sweetens the deal and contributes to that lovely chewy texture.
- Eggs: Two large eggs act as binders, bringing everything together in cookie harmony.
- Vanilla Extract: Just a teaspoon adds depth and enhances the overall flavor profile.
For the Decorations:
- White Icing: Use store-bought or homemade icing for wrapping your mummies—it’s all about that ooey-gooey look!
- Chocolate Chips: Mini chocolate chips work perfectly for those adorable little eyes.
The full ingredients list, including measurements, is provided in the recipe card directly below.
How to Make Halloween Mummy Cookies
Follow these simple steps to prepare this delicious dish:
Step 1: Preheat Your Oven
Start by preheating your oven to 350°F (175°C). This ensures your cookies bake evenly and come out perfectly golden brown.
Step 2: Mix Dry Ingredients
In a medium bowl, whisk together the flour and baking powder until well combined. This step ensures there are no lumps hiding out in your cookie batter.
Step 3: Cream Butter and Sugar
In a large mixing bowl, beat together the softened butter and granulated sugar until light and fluffy—think clouds but edible! This should take about three minutes using an electric mixer.
Step 4: Add Eggs and Vanilla
Crack those eggs into the butter-sugar mix one at a time, mixing well after each addition. Then pour in that heavenly vanilla extract. It’ll smell amazing—try not to eat it all right now!
Step 5: Combine Wet and Dry Ingredients
Gradually add the dry mixture into your wet ingredients until fully incorporated. Don’t overmix—just blend until you see no flour streaks. We want fluffy cookies, not dense ones!
Step 6: Bake Your Cookies
Scoop tablespoons of dough onto baking sheets lined with parchment paper. Space them apart because they’ll spread like gossip at a family gathering! Bake for about ten minutes or until golden around the edges.
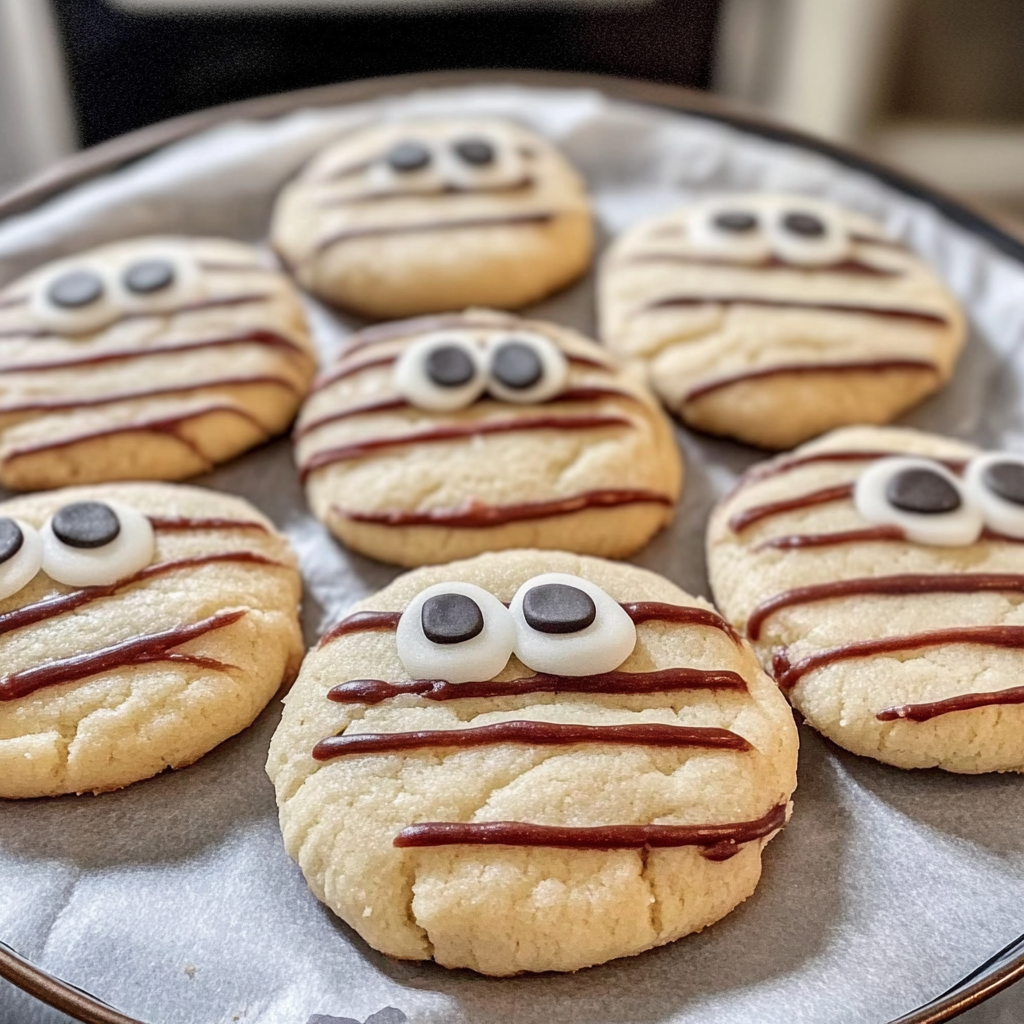
Transfer to plates and decorate them with white icing like mummy wrappings. Add mini chocolate chips for those cute little eyes—let your creativity shine!
Now you have an arsenal of delicious Halloween Mummy Cookies ready to impress ghouls and goblins alike! These treats are super easy to make but packed with fun flavors that will keep everyone coming back for more. Enjoy every bite as you celebrate this enchanting season! For more inspiration, check out this Delicious Easter Cookies recipe.
You Must Know
- These Halloween Mummy Cookies combine deliciousness with a spooky twist, perfect for the season.
- Simple to make and fun to decorate, they are a hit at any Halloween gathering.
- Plus, you can easily customize them for a personal touch that will impress guests and trick-or-treaters alike.
Perfecting the Cooking Process
Start by preheating your oven to 350°F (175°C). While it warms up, mix your cookie dough and chill it for about 30 minutes. This helps the cookies hold their shape. Shape your dough into small circles, bake them until golden brown, and let them cool before decorating.
Add Your Touch
Feel free to swap out the chocolate chips for colorful candy pieces or add some sprinkles on top for extra pizzazz. You could also use different icing colors to create unique mummy faces or even add peanut butter for a nutty flavor twist.
Storing & Reheating
Store your Halloween Mummy Cookies in an airtight container at room temperature for up to five days. If you want to enjoy them later, freeze them in a single layer on a baking sheet before transferring them to a zip-top bag for up to three months.
Chef's Helpful Tips
- Use chilled dough to prevent spreading during baking.
- Always check your cookies a minute or two early; ovens vary in temperature.
- Keep icing at room temperature for easy piping on those spooky mummies.
Nothing beats the laughter of my kids when they see these Mummy Cookies come out of the oven! The spooky faces and gooey icing always spark joy during our family Halloween parties.
FAQs
What are Halloween Mummy Cookies?
Halloween Mummy Cookies are a festive treat perfect for Halloween celebrations. These cookies typically feature a soft and chewy texture, often made from sugar cookie dough. They are decorated to resemble mummies, using white icing to create bandages and chocolate chips or candy eyes for a spooky touch. Kids and adults alike enjoy these fun cookies, making them an ideal addition to any Halloween party or gathering.
How can I store my Halloween Mummy Cookies?
To keep your Halloween Mummy Cookies fresh, store them in an airtight container at room temperature. They can last up to one week when stored properly. If you want to preserve their freshness for a longer period, consider freezing the cookies. Place them in a freezer-safe bag or container, separating layers with parchment paper. When ready to enjoy, thaw them at room temperature before serving.
Can I customize the design of my Halloween Mummy Cookies?
Absolutely! While traditional Halloween Mummy Cookies use white icing for the mummy wraps, you can get creative with colors and designs. Consider using different colored icing or adding sprinkles for extra flair. You might also use various candies for the eyes. Customizing these cookies allows you to match your personal style or theme for your Halloween celebration.
Are Halloween Mummy Cookies suitable for kids?
Yes, Halloween Mummy Cookies are perfect for kids! They are fun to make and decorate, providing a great opportunity for family bonding during the holiday season. The ingredients are generally kid-friendly, but always check for allergies if you’re sharing with others. Letting kids help create these spooky treats can make for memorable moments in the kitchen.
Conclusion for Halloween Mummy Cookies
In conclusion, fun Halloween treats that appeal to all ages. Their simple ingredients and fun decorating process make them easy to prepare at home. By following this recipe, you can create festive cookies that not only taste great but also bring joy to your Halloween festivities. Enjoy baking and sharing these adorable mummy-themed cookies with friends and family!
Halloween Mummy Cookies
Halloween Mummy Cookies are an adorable and delicious treat perfect for your Halloween celebrations! These soft and chewy cookies, draped in gooey white icing with cute chocolate chip eyes, are sure to delight both kids and adults alike. Easy to make and fun to decorate, they add a festive touch to any gathering. Whether you’re hosting a spooky party or enjoying a cozy family baking session, these cookies will be the highlight of the season!
- Prep Time: 20 minutes
- Cook Time: 10 minutes
- Total Time: 30 minutes
- Yield: Approximately 24 cookies 1x
- Category: Dessert
- Method: Baking
- Cuisine: American
Ingredients
- 2 ½ cups all-purpose flour
- 1 tsp baking powder
- 1 cup unsalted butter (room temperature)
- 1 cup granulated sugar
- 2 large eggs
- 1 tsp vanilla extract
- White icing (for decoration)
- Mini chocolate chips (for eyes)
Instructions
- Preheat oven to 350°F (175°C).
- In a bowl, whisk together flour and baking powder; set aside.
- In a large mixing bowl, beat butter and sugar until light and fluffy.
- Add eggs one at a time, mixing well after each addition, then stir in vanilla extract.
- Gradually mix in dry ingredients until just combined; do not overmix.
- Scoop tablespoon-sized portions onto parchment-lined baking sheets, spacing them apart.
- Bake for 10 minutes or until edges are golden brown.
- Cool before decorating with white icing and mini chocolate chips for eyes.
Nutrition
- Serving Size: 1 serving
- Calories: 150
- Sugar: 10g
- Sodium: 50mg
- Fat: 8g
- Saturated Fat: 5g
- Unsaturated Fat: 2g
- Trans Fat: 0g
- Carbohydrates: 18g
- Fiber: 0g
- Protein: 2g
- Cholesterol: 25mg
Keywords: - Chill dough for 30 minutes before baking to help maintain shape. - Customize decorations with colorful candies or sprinkles for added fun. - For a twist, experiment with different flavored extracts or add nuts.
Leave a Comment