Introduction and Quick Summary
If you are searching for a dessert that leaves an unforgettable impression, look no further than molten lava cakes. These decadent treats feature a warm, gooey center that flows out as soon as you cut into them. Perfectly baked on the outside but delightfully soft on the inside, molten lava cakes are ideal for romantic dinners, celebrations, or just a cozy night in with family. The best part is that they’re surprisingly simple to make at home! With just a few ingredients and some straightforward steps, you will impress your guests and satisfy your sweet cravings.
This recipe will guide you through creating the perfect molten lava cakes that are rich in flavor and texture. You will learn about the essential ingredients needed to achieve that luxurious taste and how to prepare them in just a few easy steps. Plus, we’ll share some tips on serving and storing these delectable desserts so you can enjoy them even longer. So grab your apron and get ready to whip up something extraordinary that will have everyone coming back for seconds!
Main Ingredients
Dark Chocolate
Dark chocolate is the star of this recipe. It provides the rich flavor and smooth texture that makes molten lava cakes so irresistible. For this recipe, you will need 4 ounces of high-quality dark chocolate with at least 60% cacao content. This ensures the right balance of sweetness and intensity. Chop the chocolate into small pieces to help it melt quickly.
Unsalted Butter
Unsalted butter adds creaminess and richness to the batter. You will need ½ cup (1 stick) of unsalted butter for this recipe. Using unsalted allows better control over the saltiness of your final product. Make sure it’s at room temperature before starting; this helps it blend seamlessly with the chocolate.
Granulated Sugar
Granulated sugar is essential for sweetness and helps achieve that perfect texture in your cakes. You will use ½ cup of granulated sugar in this recipe. It not only sweetens but also aids in creating a nice crust on the outside while keeping the inside soft and gooey.
Eggs
Eggs are crucial for binding all ingredients together while adding structure to your cakes. You’ll need two large eggs along with two egg yolks for this recipe. The combination ensures that your molten lava cakes rise beautifully while still maintaining their signature liquid center.
All-Purpose Flour
All-purpose flour gives structure without making them too dense or heavy. You only require ¼ cup of flour for this recipe. Be careful not to overmix when adding it to ensure a light texture.
Vanilla Extract
Vanilla extract enhances all flavors in your molten lava cakes. Just one teaspoon is enough to elevate the taste profile significantly.

How to Prepare Molten Lava Cakes
Step 1: Preheat Your Oven
Start by preheating your oven to 425°F (220°C). Ensure it reaches this temperature before you put your cakes in; doing so guarantees they bake evenly and develop that signature crust around their soft center.
Step 2: Melt Chocolate and Butter
In a medium microwave-safe bowl, combine chopped dark chocolate and unsalted butter. Heat them together in the microwave at 30-second intervals until fully melted, stirring after each interval to prevent burning. This process should take about 1-2 minutes total depending on your microwave’s strength; be patient! Once melted, allow it to cool slightly before proceeding.
Step 3: Whisk Eggs and Sugar
In another bowl, whisk together two large eggs, two egg yolks, and granulated sugar until well combined—this usually takes about two minutes with an electric mixer or five minutes by hand until light and fluffy.
Step 4: Combine Mixtures
Once both mixtures have cooled down sufficiently (you don’t want scrambled eggs), gradually pour the melted chocolate-butter mixture into the egg-sugar mixture while constantly whisking. This technique helps maintain a smooth consistency without cooking the eggs from heat shock.
Step 5: Fold in Flour
Gently fold in ¼ cup of all-purpose flour and one teaspoon of vanilla extract using a spatula until no dry flour remains visible—be cautious not to overmix! The batter should be thick yet pourable.
Step 6: Prepare Ramekins
Grease four ramekins (6-ounce size recommended) thoroughly with butter or non-stick spray for easy release later on after baking! Dust them lightly with cocoa powder or flour if desired; this step can help enhance texture further while preventing sticking.
Step 7: Fill Ramekins
Evenly distribute the batter among each ramekin until they are about three-quarters full—this allows space for rising during baking without spilling over!
Step 8: Bake Your Cakes
Place filled ramekins onto a baking sheet for easier handling then transfer them carefully into preheated oven! Bake for approximately 12-14 minutes until edges appear firm but centers remain soft—trust us; do not overbake!
Step 9: Let Cool Briefly
Once baked perfectly remove from oven immediately but let sit at room temperature for just one minute—this brief cooling period allows centers settle slightly without losing their signature flowy nature inside!
Step 10: Serve Warm
To serve carefully invert each ramekin onto individual plates; tap gently if necessary! Dust lightly with powdered sugar or cocoa powder if desired then serve immediately alongside ice cream or fresh berries!

Serving and Storing Tips
Serving Suggestions
Molten lava cakes shine brightest when served warm right after baking! Pair them with a scoop of vanilla ice cream or whipped cream for an extra indulgent treat; this contrast between hot cake versus cold topping creates delightful harmony on every bite! Consider garnishing plates with fresh berries like strawberries or raspberries—they add color plus tartness balancing sweetness superbly!
Storing Leftovers
If you happen to have leftovers (though unlikely!), store unbaked batter in covered container inside refrigerator up-to two days before baking fresh again later—remember though baked cakes cannot be reheated effectively without compromising texture! Alternatively freeze unbaked filled ramekins wrapped tightly using plastic wrap then foil too; thaw overnight within refrigerator before baking accordingly whenever hunger strikes next time around!
This detailed approach ensures every step leads toward creating luscious molten lava cakes bursting flavor surprises within each slice—enjoy all aspects from preparation through presentation effortlessly!
Mistakes to avoid
When making Molten Lava Cakes, attention to detail is crucial. One common mistake is not using the right type of chocolate. Many people opt for semi-sweet or milk chocolate, but dark chocolate offers a richer flavor and better structure. Always choose high-quality dark chocolate (around 60-70% cacao) to ensure that your cakes have the perfect molten center.
Another mistake is overbaking the cakes. It can be tempting to leave them in the oven longer to achieve a firmer texture, but that’s a surefire way to lose the gooey center that makes these desserts special. Stick to the recommended baking time, and perform the toothpick test: insert it into the outer edge of the cake; it should come out clean while the center remains soft.
Incorrectly greasing the ramekins can also ruin your dessert. If you don’t grease them well enough, the cakes may stick, making it impossible to release them intact. Conversely, over-greasing can lead to an oily residue on your finished cake. Use butter and dust with cocoa powder for an ideal non-stick surface.
Lastly, don’t skip letting your batter rest before baking. This resting period allows air bubbles to settle and helps create a smoother texture in your final product. If you bake immediately after mixing, you could end up with unevenly cooked cakes that lack that signature lava flow.

Tips and tricks
To achieve perfect Molten Lava Cakes, start by prepping all your ingredients ahead of time. Measure out your chocolate, butter, eggs, sugar, and flour before you begin. This ensures a smooth process and helps avoid mistakes during baking.
Use high-quality ingredients for the best results. The taste of Molten Lava Cakes largely relies on chocolate quality; therefore, invest in a good brand of dark chocolate and pure vanilla extract. Fresh ingredients yield better flavors and textures.
Investing in proper ramekins is essential as well. Choose ramekins with straight sides that are around 6 ounces in size to ensure even cooking throughout each cake. This size provides enough space for the molten center while allowing for consistent baking.
Another helpful tip is to practice portion control when filling your ramekins with batter. Overfilling can cause overflow during baking and lead to messy outcomes. Aim to fill each ramekin about two-thirds full; this allows room for rising without spilling over.
Finally, let your cakes cool for about a minute before attempting to remove them from their ramekins. This cooling time solidifies the outer layer slightly while keeping the inside molten. Gently run a knife around the edge of each cake before inverting them onto plates for easy release without breaking apart.
Suggestions for Molten Lava Cakes
When serving Molten Lava Cakes, consider pairing them with ice cream or whipped cream for contrast in temperature and texture. Vanilla bean ice cream complements the rich chocolate perfectly while adding a creamy element that enhances every bite.
You can add flavored sauces or coulis on top or around your cakes as well. Raspberry sauce adds tartness that cuts through sweetness, balancing flavors beautifully while enhancing visual appeal with its vibrant color.
For an extra touch of sophistication, dust finished cakes with powdered sugar or cocoa powder right before serving. This simple step elevates presentation and adds a hint of sweetness without overwhelming the dessert’s rich flavor profile.
If you’re looking to customize flavors, consider incorporating espresso powder into your batter or infusing it with orange zest for a unique twist on traditional recipes. These variations keep things interesting while highlighting different flavor notes within each cake.
Lastly, serve these delightful treats warm from the oven for maximum impact! The contrast between hot molten centers and cold accompaniments creates an unforgettable dessert experience that guests will rave about long after they’ve left your table.

FAQs
What is the best type of chocolate for Molten Lava Cakes?
The ideal choice for Molten Lava Cakes is high-quality dark chocolate with 60-70% cacao content. This type offers a rich flavor profile that balances sweetness while ensuring a luxurious texture when melted inside the cake. Using semi-sweet or milk chocolate may lead to an overly sweet result that masks the deeper cocoa notes desirable in this dessert. Remember that quality matters significantly; using gourmet brands will yield far superior results compared to standard grocery store varieties.
Can I prepare Molten Lava Cake batter ahead of time?
Yes! You can prepare Molten Lava Cake batter ahead of time by mixing all ingredients together and storing it in the refrigerator until you’re ready to bake them fresh. Make sure you cover it tightly with plastic wrap or transfer it into an airtight container to maintain freshness and prevent drying out or absorbing odors from other foods stored nearby. When you’re ready to bake, simply pour into greased ramekins and adjust baking times accordingly if they’re coming straight from cold storage; they might require an additional minute or two due to lower temperatures.
How do I know when my Molten Lava Cakes are done?
The key indicator lies in using a toothpick test as you approach suggested baking times—insert it gently into one side of each cake near its edge rather than directly through its center so as not disrupt melting goodness inside! It should come out clean from edges but remain gooey at centers if perfectly baked; this signifies you’ve achieved desired lava-like consistency inside without overcooking outer layers which would eliminate their trademark molten quality!
Can I freeze leftover Molten Lava Cakes?
Freezing leftover Molten Lava Cakes is possible but requires careful handling! Allow them cool completely after baking before wrapping tightly in plastic wrap or placing inside freezer-safe containers—this prevents freezer burn! When ready for indulgence again later on (within three months), simply thaw overnight in refrigerator then reheat gently at low temperature either oven or microwave until warm throughout; however watch carefully not go too far otherwise risk losing delicious gooeyness within!
What should I serve with Molten Lava Cakes?
Pairing options abound when serving delectable molten lava creations! Classic choices include vanilla ice cream which beautifully contrasts warmth & richness inherent these desserts while providing creamy texture each bite enhancing overall experience significantly! Alternatively consider fresh berries like raspberries/blueberries atop drizzle fruit coulis around plated desserts completing visual feast alongside refreshing tartness balancing sweetness quite nicely making enjoyable combination both aesthetically pleasing delicious!
Are there gluten-free options for Molten Lava Cakes?
Absolutely—creating gluten-free versions requires simple modifications using alternatives such as almond flour or gluten-free all-purpose mixes instead traditional wheat flour used typical recipes! Just make sure any substitutes maintain similar measurements so consistency doesn’t compromise final product integrity ensuring still luscious moist interior & decadent exterior finish remains intact throughout testing process leading up towards ultimate enjoyment upon consumption!
Conclusion
Making perfect Molten Lava Cakes requires attention to detail and care at every stage—from selecting high-quality ingredients like dark chocolate and ensuring proper greasing techniques for ramekins down through optimal baking times tailored specifically towards achieving signature gooey centers everyone craves! Avoid common pitfalls such as overbaking by sticking closely following suggested guidelines along with utilizing helpful tips which will surely elevate success rates within kitchen endeavors!
Remember also enhance overall presentation through thoughtful pairings alongside creative garnishing options showcasing vibrant colors textures harmoniously dancing across plates inviting eager taste buds explore indulgent treats awaiting discovery! By implementing these strategies combined well-established practices anyone can delight friends family alike showcasing culinary prowess resulting mouthwatering moments cherished long after last bites enjoyed leaving guests asking how replicate such delightful experiences once more!
Print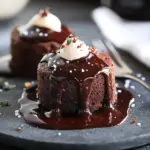
Molten Lava Cakes
- Author: Sofia
- Total Time: 24 minutes
- Yield: 4 servings 1x
Description
Satisfy your sweet cravings with this decadent molten lava cake recipe. Warm, rich chocolate with a gooey center that oozes out when you take the first bite—perfect for impressing guests or enjoying a treat on a cozy evening.
Ingredients
- 4 oz semi-sweet chocolate
- 1/2 cup unsalted butter
- 1 cup powdered sugar
- 2 large eggs
- 2 large egg yolks
- 1 tsp vanilla extract
- 1/4 cup all-purpose flour
- Pinch of salt
Instructions
- Preheat your oven to 425°F (220°C) and grease four ramekins with butter, then dust with flour.
- Melt the chocolate and butter together in a microwave-safe bowl, stirring until smooth.
- In a separate bowl, whisk together the eggs, egg yolks, and powdered sugar until light and fluffy.
- Add the melted chocolate mixture and vanilla extract to the egg mixture and stir to combine.
- Gently fold in the flour and salt until the batter is smooth.
- Pour the batter evenly into the prepared ramekins and bake for 12-14 minutes, or until the edges are firm but the center is soft.
- Let the cakes cool for 1 minute, then carefully invert onto plates and serve warm.
Notes
- For a twist, add a piece of caramel or peanut butter in the center before baking.
- Serve with a scoop of vanilla ice cream or fresh berries for extra indulgence.
- Be sure not to overbake, as the molten center is the highlight of the dessert!
- Prep Time: 10 minutes
- Cook Time: 14 minutes


