Introduction and Quick Summary
Red velvet brownies are the perfect treat that combines the classic flavors of chocolate with the unique twist of rich red velvet. These decadent squares offer a visual delight with their deep crimson hue and creamy frosting. Whether you’re hosting a gathering or simply indulging in a sweet craving at home, these brownies are sure to impress everyone around you. The texture is fudgy and moist, making them an irresistible option for dessert lovers. Plus, they are incredibly easy to make! With just a few simple ingredients and steps, you can whip up a batch of these delicious treats in no time. In this article, we will guide you through the process of creating your own red velvet brownies from scratch. We’ll also provide tips on how to serve them and store any leftovers to maintain their freshness. Get ready to dive into the world of baking with this delightful recipe!
Main Ingredients
All-Purpose Flour
All-purpose flour serves as the base for your red velvet brownies. It provides structure and helps achieve that perfect chewy texture. For this recipe, you will need one cup (125g) of all-purpose flour. Make sure to sift the flour before measuring to avoid any lumps in the batter.
Cocoa Powder
Cocoa powder is essential for adding that rich chocolate flavor to your brownies. You will need ¼ cup (30g) of unsweetened cocoa powder for this recipe. Look for high-quality cocoa powder to enhance the taste. It’s best to use Dutch-processed cocoa powder as it gives a deeper color and flavor profile.
Granulated Sugar
Granulated sugar not only sweetens your brownies but also contributes to their moistness. You’ll require one cup (200g) of granulated sugar for this recipe. When mixed with butter and eggs, sugar plays a crucial role in creating a smooth batter that bakes beautifully.
Eggs
Eggs provide moisture and help bind the ingredients together in your brownie batter. For this recipe, you will need two large eggs at room temperature. Beating them well adds airiness to the batter, resulting in light yet fudgy brownies.
Vegetable Oil
Vegetable oil keeps your red velvet brownies moist and adds richness without an overpowering flavor. You will need ½ cup (120ml) of vegetable oil for this recipe. Using oil instead of butter makes it easier to mix while still delivering that delightful tenderness.
Buttermilk
Buttermilk is key in giving your brownies that distinct tangy flavor associated with red velvet desserts. You’ll need ½ cup (120ml) of buttermilk for this recipe. If you don’t have buttermilk on hand, you can create a substitute by mixing regular milk with vinegar or lemon juice.
Red Food Coloring
The vibrant red color is what makes these brownies stand out! You will need about 1 tablespoon (15ml) of liquid red food coloring for this recipe. This ingredient not only enhances appearance but also complements the cocoa powder’s flavor.
Vanilla Extract
Vanilla extract adds depth to your brownie batter by enhancing all the other flavors present in the mixture. You’ll want to use 1 teaspoon (5ml) of pure vanilla extract in this recipe for optimal taste.
Cream Cheese Frosting (Optional)
For those who love extra decadence, cream cheese frosting is an excellent addition on top of your baked brownies. This optional ingredient requires 4 ounces (113g) of softened cream cheese mixed with ¼ cup (30g) powdered sugar and 1 teaspoon vanilla extract.

How to Prepare Red Velvet Brownies
Step 1: Preheat Your Oven
To start off your baking adventure, preheat your oven to 350°F (175°C). This step is vital because it ensures that your brownies bake evenly throughout. While the oven heats up, take out an 8×8 inch baking pan and line it with parchment paper or grease it lightly with cooking spray to prevent sticking later on.
Step 2: Mix Wet Ingredients
In a large mixing bowl, combine your vegetable oil and granulated sugar using a whisk until smooth and well-blended—about two minutes should suffice. Next, add in both eggs one at a time while whisking after each addition until fully incorporated into the mixture. Then pour in your buttermilk along with vanilla extract followed by mixing again until everything is perfectly combined.
Step 3: Combine Dry Ingredients
In another medium-sized bowl, sift together all-purpose flour, cocoa powder, and any salt if added—it’s optional here! Gently fold these dry ingredients into your wet mixture using either a spatula or wooden spoon until no dry streaks remain; be careful not to overmix as this could lead to dense brownies!
Step 4: Add Food Coloring
Now comes the fun part—adding color! Pour in your liquid red food coloring into the brownie batter while gently folding it through until evenly distributed throughout; aim for a consistent shade without clumps showing up anywhere within that luscious mix!
Step 5: Bake Your Brownies
Once thoroughly mixed together—transfer that glorious brownie batter into prepared pan smoothing out any uneven spots on top using an offset spatula if necessary! Place it into preheated oven allowing them ample time—about 25-30 minutes—until they set firmly yet still soft enough when tested via toothpick method where some crumbs stick but no wet batter remains attached!
Step 6: Cool Down & Frost
After removing from oven let cool completely inside pan before transferring onto wire rack—this could take about an hour depending on temperature conditions around! If you choose—to frost—prepare cream cheese frosting by mixing softened cream cheese alongside powdered sugar plus vanilla until creamy; spread onto cooled brownie surface evenly before slicing into squares ready for enjoyment!
Serving and Storing Tips
Serving Suggestions
When serving these delightful red velvet brownies, consider pairing them with whipped cream or vanilla ice cream on top for added indulgence! They also shine at gatherings when cut into bite-sized pieces displayed elegantly on platters alongside fresh berries or mint leaves as garnishes providing beautiful contrast visually while enhancing taste experience too!
For special occasions like birthdays or holidays—use festive plates while serving—this simple touch elevates presentation even more making every guest feel catered-to personally which is always appreciated during celebrations!
Remember—the key here isn’t just about looks; ensure they’re warm upon serving so flavors meld beautifully together enhancing overall enjoyment factor when indulging into each fudgy mouthful blissfully!
Storage Tips
To keep leftover red velvet brownies fresh post-baking session—it’s crucial storing correctly! Once cooled completely place them inside an airtight container lined between layers using parchment paper preventing any potential sticking issues occurring later down road!
Alternatively—you can freeze uncut batches wrapped tightly within plastic wrap then placed inside freezer-safe bags ensuring maximum freshness retention lasting several weeks easily accessible whenever cravings strike unexpectedly! Just thaw overnight prior consuming again enjoying delectable treats once more!
Mistakes to avoid
One common mistake when making red velvet brownies is not measuring ingredients accurately. Baking is a science, and even slight variations in measurements can lead to disastrous results. Always use a kitchen scale for dry ingredients like flour and cocoa powder. For liquids, use measuring cups designed for liquids to ensure precision. This will help maintain the right texture and taste in your brownies.
Another frequent error is overmixing the batter. When you overmix, you incorporate too much air, which can lead to a cake-like texture instead of the desired fudgy consistency. Mix just until the ingredients are combined; a few lumps are perfectly fine. Remember that brownies should be dense and rich rather than light and fluffy.
Using low-quality chocolate or cocoa powder can also ruin your red velvet brownies. Quality matters in baking, so invest in good cocoa powder that has rich flavor and color. The same goes for chocolate; choose high-quality chocolate chips or bars that melt well and impart the best taste. This will significantly enhance the overall flavor profile of your brownies.
Not allowing your brownies to cool properly before cutting is another mistake that many people make. If you cut into them while they are still warm, they may fall apart and lose their shape. Let them cool completely in the pan before slicing into squares. This ensures clean edges and allows the flavors to meld together beautifully.
Finally, neglecting to line your baking pan can lead to a sticky situation. Always line your pan with parchment paper or foil before pouring in the brownie batter. This simple step makes it easier to lift out the finished product without tearing it apart, ensuring that you have perfect squares ready for serving.

Tips and tricks
To achieve perfect red velvet brownies, start with room temperature ingredients. Eggs, butter, and any dairy products mix more smoothly when they are at room temperature. This helps create a more uniform batter, leading to evenly baked brownies with a consistent texture throughout.
Consider using buttermilk for added moisture and richness in your batter. Buttermilk not only enhances the flavor but also reacts with baking soda to create a lighter texture while maintaining the desired density of brownies. If you don’t have buttermilk on hand, you can easily make a substitute by mixing milk with vinegar or lemon juice.
Incorporating food coloring correctly is crucial for achieving that signature red hue of red velvet brownies without compromising flavor. Use gel food coloring instead of liquid food coloring for better results; gel colors provide more vibrancy without adding extra moisture that could alter the brownie’s texture.
When baking your brownies, always preheat your oven thoroughly before placing them inside. An adequately preheated oven helps create an even bake and prevents uneven cooking – both critical factors in achieving those chewy edges and fudgy centers that everyone loves about red velvet brownies.
Lastly, experiment with mix-ins such as walnuts or chocolate chips for added texture and flavor depth. These additions can take your red velvet brownies from ordinary to extraordinary while providing delightful surprises in every bite. Just be sure not to overload them; keep it balanced so you still enjoy that signature red velvet taste.
Suggestions for red velvet brownies
For those looking to switch things up a bit, consider making red velvet brownie sundae bars as an exciting dessert option. Simply bake your favorite batch of red velvet brownies and let them cool completely before cutting them into squares. Top each square with generous scoops of vanilla ice cream, drizzles of chocolate sauce, whipped cream, or even crushed nuts for an indulgent treat that’s perfect for parties or family gatherings.
If you’re aiming for a healthier alternative without sacrificing flavor, try substituting some ingredients in your recipe. You can replace half of the all-purpose flour with whole wheat flour for added fiber while keeping the same delicious taste intact. Additionally, using unsweetened applesauce instead of some butter can reduce calories without compromising moisture levels in your brownies.
To amp up the chocolatey goodness further, consider adding a layer of cream cheese frosting on top of cooled red velvet brownies. The tanginess from the cream cheese complements the sweetness nicely while providing an appealing contrast in flavors and textures—making every bite even more satisfying!
For an easy gluten-free option, simply replace regular flour with almond flour or any other gluten-free flour blend available on the market today! This adaptation allows those with dietary restrictions to enjoy these delightful treats without missing out on their favorite flavors.
You might also want to package individual servings as gifts during holidays or special occasions! Wrap each piece neatly in cellophane tied off with decorative ribbons—it’s an excellent way to share love through baking while adding personal touches that friends and family will appreciate!

FAQs
What makes red velvet brownies different from regular brownies?
Red velvet brownies differ from regular brownies primarily due to their unique flavor profile and appearance. They typically contain cocoa powder along with buttermilk and vinegar which gives them their characteristic tangy taste reminiscent of traditional red velvet cake recipes. The addition of food coloring provides vibrant hues—making these treats visually distinct as well! While regular brownies tend to focus solely on rich chocolate flavors, red velvet versions incorporate subtle hints of vanilla along with their signature color—creating an inviting dessert experience unlike any other!
Can I use cocoa powder instead of melted chocolate?
Yes! You can use cocoa powder as a substitute for melted chocolate in red velvet brownie recipes; however, this may alter both flavor intensity and texture slightly compared to using actual melted chocolate bars or chips since cocoa powder lacks fat content found in chocolate products themselves! If opting this route when preparing your mixture—consider increasing butter slightly (by one tablespoon) while keeping proportions similar—this could help maintain overall moistness achieved through traditional methods resulting ultimately yielding delicious desserts!
How do I store leftover red velvet brownies?
Storing leftover red velvet brownies properly ensures their freshness! Allow them enough time after baking before transferring into airtight containers—preferably lined with parchment paper between layers if stacking multiple pieces together—to prevent sticking together over time! Keep these containers stored away at room temperature if consuming within two days; otherwise refrigerate leftovers extending shelf life up longer periods (upward 1 week). Freezing options exist too: wrap tightly using plastic wrap then place inside freezer bags—enjoy delectable bites over several weeks later when cravings arise!
Can I make these gluten-free?
Absolutely! Red velvet brownies can easily be made gluten-free by swapping out regular all-purpose flour for gluten-free alternatives available today such as almond flour or coconut flour blends designed specifically catered toward those following dietary restrictions! Follow recommended ratios indicated on product labels during substitutions ensuring balance remains intact allowing same delightful flavors experienced through traditional recipes enjoyed universally!
What can I use instead of eggs?
If you need egg substitutes due allergies vegan preferences—you have several options available including unsweetened applesauce (1/4 cup per egg), mashed bananas (1/2 medium banana per egg), flaxseed meal mixed water ratio (1 tablespoon flaxseed meal + 3 tablespoons water = 1 egg equivalent)—these alternatives work wonders retaining moisture while providing necessary binding qualities required within classic brownie mixtures yielding great results still!
How long should I bake my red velvet brownies?
Baking time varies depending upon specific recipe used alongside size/type baking dish selected but generally ranges between 25-35 minutes at 350°F (175°C). To check doneness insert toothpick center; it should emerge mostly clean showing slight moist crumbs attached indicating fudgy consistency achieved desired outcome! Avoid overbaking which could lead dryness ruining luscious indulgence sought after here!
Conclusion
In summary, crafting delicious red velvet brownies requires attention to detail while avoiding common pitfalls such as inaccurate measurements or poor ingredient choices. By incorporating tips like using quality chocolates and allowing proper cooling time before cutting into slices will ensure success every time you make this delightful treat! Don’t hesitate either experimenting different variations—from healthy swaps incorporating whole wheat flours/substitutes down decadent toppings transforming simple desserts into stunning masterpieces fit any occasion imaginable—the possibilities truly endless here! Remember always store leftovers correctly maintain freshness prolong enjoyment savoring sweet moments shared loved ones indulging everyone’s favorite treat: scrumptious velvety bites await—you won’t regret diving right away these heavenly delights today!
Print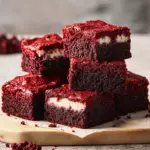
Delicious Red Velvet Brownies Recipe
- Author: Sofia
- Total Time: 6 minute
- Yield: 12-16 brownies 1x
Description
These Red Velvet Brownies are the perfect combination of rich, fudgy chocolate and the signature red velvet flavor. With a dense, moist texture and a hint of tang from cream cheese frosting, these brownies are a decadent and vibrant treat perfect for any occasion!
Ingredients
For the brownies:
- 1/2 cup unsalted butter, melted
- 1 cup granulated sugar
- 2 large eggs
- 1 tbsp red food coloring
- 1 tsp vanilla extract
- 1 1/2 cups all-purpose flour
- 1/4 cup unsweetened cocoa powder
- 1/2 tsp baking powder
- 1/4 tsp salt
- 1/2 cup buttermilk
For the cream cheese frosting:
- 4 oz cream cheese, softened
- 1/4 cup unsalted butter, softened
- 1 cup powdered sugar
- 1/2 tsp vanilla extract
Instructions
- Preheat your oven to 350°F (175°C). Grease or line an 8×8-inch baking pan with parchment paper.
- In a large bowl, whisk together the melted butter and sugar until smooth.
- Add the eggs, one at a time, mixing well after each addition. Stir in the red food coloring and vanilla extract.
- In a separate bowl, whisk together the flour, cocoa powder, baking powder, and salt.
- Gradually add the dry ingredients to the wet ingredients, alternating with the buttermilk, until fully combined.
- Pour the batter into the prepared pan, spreading it evenly.
- Bake for 25-30 minutes, or until a toothpick inserted in the center comes out clean.
- While the brownies are baking, make the cream cheese frosting. Beat together the cream cheese, butter, powdered sugar, and vanilla extract until smooth.
- Allow the brownies to cool completely in the pan before frosting.
- Once cooled, spread the cream cheese frosting evenly over the brownies and cut into squares.
Notes
- For an extra red color, you can add a bit more food coloring to the batter.
- These brownies can be stored in an airtight container at room temperature for up to 3 days.
- For a fun twist, top with mini chocolate chips or sprinkles before baking.
- Prep Time: 15 minutes
- Cook Time: 25-30 minutes


